
Table of Contents
- Why Documentation Decides Your Hail Damage Claim
- Step 1: Secure Your Vehicle and Record the Storm Details
- Step 2: Build a Hail Damage Car Photos for Insurance Set
- Step 3: Work Through a Hail Damage Insurance Claim Checklist
- Step 4: Write a Hail Damage Report the Adjuster Can Follow
- Step 5: Document Temporary Repairs, Rental Costs and Hidden Damage
- Should You Claim Hail Damage on Your Car?
- Booking Your Free Hail Damage Inspection With Hail Dawgz
- Frequently Asked Questions
Why Documentation Decides Your Hail Damage Claim
Hail damage claims are won or lost on paperwork. Adjusters decide how much to pay based on what you can prove, and a clear, dated record makes that job easy. Many car owners find that a few careful photos and notes early on save a lot of back-and-forth later.
The claims that go smoothly almost always share the same traits: the owner acted quickly and kept organized notes, which is the core of how to document hail damage for insurance.
Here is what a strong documentation file usually includes:
- The date, time, and location of the storm
- Photos and video of every damaged panel, taken in good light
- A written list of the damage and an estimate of the number of dents
- Records of any temporary repairs and related costs
- Your policy number and the claim number once it is assigned
This guide walks through each step of how to document hail damage for insurance in order. Follow it, and you will have a file that is easy for an adjuster to review.
Step 1: Secure Your Vehicle and Record the Storm Details
Time needed: 15 to 30 minutes
Start by moving your vehicle somewhere safe and covered if you can. Protecting it from more damage matters more than any photo, so do not drive it through the storm debris or leave it exposed.
Next, write down the details while they are fresh:
- The exact date and approximate time the hail hit
- The location where your car was parked
- How long the storm lasted, if you remember
- Any weather alerts or news reports you saw for the area
Save a screenshot of a local weather report or storm alert if one exists. These records help confirm the date of loss, which insurers use when they check your claim.
Watch out: Do not wait days to report the damage. A late report makes it harder to prove the hail caused the dents and not something that happened later.
Step 2: Build a Hail Damage Car Photos for Insurance Set
Time needed: 30 to 45 minutes
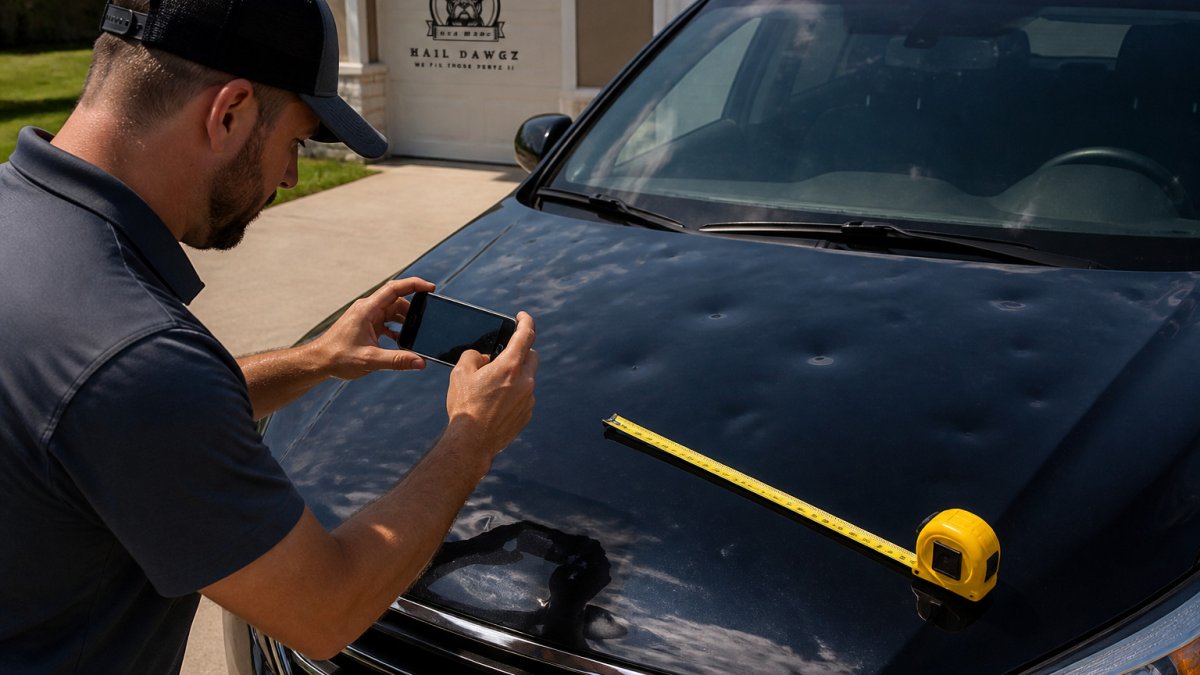
Photos carry most of the weight in a hail claim, and organized photo sets are easier for an adjuster to follow. The fix is a repeatable shot sequence you run the same way every time, so the adjuster can follow your file without calling you back.
Shoot in daylight, ideally early morning or late afternoon. Harsh midday sun blows out paint and hides dents; overcast light is actually better because it lets dents cast soft shadows. Park on a flat, clean surface and turn the wheels straight so panel gaps are even.
The shot sequence (run it in this order):
- Establishing wide shots. Stand about 10 to 15 feet back and shoot all four sides, plus front and rear, at eye level. Get the whole vehicle in frame with a little ground visible. These prove the vehicle’s condition and location.
- Corner shots. Four shots at 45-degree angles to each corner. These catch dents that disappear in straight-on views.
- Panel medium shots. One frame per panel, hood, roof, trunk, each door, each fender, each quarter panel. Fill the frame with the panel but keep its edges visible so the adjuster knows which panel it is.
- Close-ups with a reference object. Place a coin, a ruler, or a measuring tape beside each dent and shoot straight down. The reference object is what lets an adjuster judge size without visiting the car.
- Raking-light shots. Hold the phone low and across the panel so light skims the surface. Take one raking shot per damaged panel from at least two directions.
- Video walk-around. A slow, continuous 60- to 90-second video that starts at the front bumper, walks clockwise around the vehicle, and ends back at the front. Narrate panel names as you go (“driver front door, three dents near the handle”). Video is the single best evidence of overall dent count and distribution.
Label and preserve every file. Rename each photo with the panel and shot type before you upload it, for example, hood_closeup_01.jpg or roof_raking_02.jpg. Do not edit, crop, or apply filters; original timestamps and metadata are part of the evidence. Back the set up to a cloud folder and a second drive the same day, and keep the originals untouched.
Build a photo index. In a simple document, list each file name next to the panel and a one-line description. The index is what turns a folder of images into a file an adjuster can review in minutes.
Watch out: Do not photograph only the worst dents. Adjusters price the whole panel, and a file that shows three dents on a hood that actually has fifteen will be valued on what you proved, not what exists. Shoot every dent, including the small ones, and shoot each one from at least two angles.
The photo sequence below runs in the order the article recommends, so an adjuster can follow the file without calling you back.
| Shot | Where to stand | Purpose |
|---|---|---|
| Establishing wide shots | 10 to 15 feet back, eye level | Prove condition and location |
| Corner shots | 45-degree angles to each corner | Catch dents hidden in straight-on views |
| Panel medium shots | One frame per panel | Show which panel is which |
| Close-ups with reference object | Shoot straight down beside a coin or ruler | Let adjuster judge dent size |
| Raking-light shots | Low phone, light skimming the panel | Reveal dents, from at least two directions |
| Video walk-around | 60 to 90 seconds, clockwise from front bumper | Show overall dent count and distribution |
Step 3: Work Through a Hail Damage Insurance Claim Checklist
Time needed: 20 to 30 minutes
Once the photos are done, use a simple checklist to keep the claim on track. Work through each item before you contact your insurer.
- Confirm your policy includes comprehensive coverage, which usually handles hail
- Note your policy number and deductible
- Record the storm date and location
- Save all photos and video with the date visible in the file details
- Write down every damaged area
- Get at least one written repair estimate
- Ask your insurer which repair shops and rental options they cover
- Keep a copy of every email, call note, and letter
Checking your coverage early prevents surprises. Review your policy terms before you file.
Step 4: Write a Hail Damage Report the Adjuster Can Follow
Time needed: 30 minutes
A written report tells the adjuster what you found in plain language. Keep it short, factual, and organized by panel. Avoid guessing about the cause beyond what the storm data and the damage pattern show.
A simple format works well:
Vehicle: Year, make, model, and VIN
Storm date: Month, day, and year
Location parked: Street or lot name
Damage summary: Number of dents, which panels, and rough size
Photo index: A numbered list that matches each photo to its panel
Here is an example line from a clear report:
“Hood has about 14 dents, ranging from quarter-sized to golf-ball sized. Roof has about 6 dents concentrated on the driver side. Photos 8 through 15 show the hood from multiple angles.”
Use numbers and locations, not general words like “a lot of damage.” The more specific the report, the faster the review.
Step 5: Document Temporary Repairs, Rental Costs and Hidden Damage
Time needed: Ongoing
This is the step most owners skip, and it is where claims quietly lose money. Temporary repairs, rental costs, and damage that appears days later all need the same treatment as the original dents: dated, photographed, and logged.
Document temporary repairs with before-and-after photos. Before you cover a broken window, tarp a leaking area, or seal a cracked trim piece, take a wide shot and a close-up of the damage. After the repair, take a matching shot from the same angle. Save the receipt and write the date and purpose on it. Keeping a before-and-after pair plus the receipt documents the expense.
Keep a dated claim log. Start a single document the day you report the claim and add an entry every time something happens: the call with the insurer, the adjuster’s visit, the rental pickup, the repair estimate. Each entry should have the date, who you spoke with, what was said, and any reference or claim number. If a dispute arises later, the log is your timeline.
Handle hidden or later-discovered damage promptly. Some damage does not show up at first, hairline cracks in paint over a dent, a slow leak in the trunk seal, a rattle in a door. Check the vehicle again after the first rain and after a few days of driving. When you find something new, photograph it with a date reference (a phone showing the date in frame works), add it to your photo index, and notify your insurer in writing the same day. Do not wait for the adjuster’s visit to mention it; a written update creates a record that the damage was reported promptly.
Track every out-of-pocket cost. Keep a simple table with four columns: date, item, amount, and receipt file name. Include tarps and covers, temporary sealing materials, rental car invoices if your policy includes rental coverage, and mileage or ride-share costs while the car is out of service. Store originals in one folder, digital or paper.
Watch out: Keep damaged parts or replaced panels until the claim is fully settled, in case an adjuster wants to inspect them.
Should You Claim Hail Damage on Your Car?
Not every hail claim makes financial sense. Your deductible is the amount you pay before insurance covers the rest. If the repair estimate is only slightly above your deductible, a claim may not pay you much, and it could affect your future premiums.
Ask yourself a few questions before filing:
- Is the estimate clearly above my deductible?
- Is the damage likely to lower my car’s value if it is not fixed?
- Would a claim increase my premium at renewal?
- Do I have rental coverage I could use during repairs?
Some owners get a repair estimate first and then decide. Ways to limit out-of-pocket hail repair costs can help you compare your options before filing. This gives you real numbers to compare. Many car owners find that the answer becomes clear once the estimate is in hand.
Booking Your Free Hail Damage Inspection With Hail Dawgz
Once your documentation is ready, a professional inspection can confirm the full extent of the damage. At Hail Dawgz, our certified technicians use paintless dent repair to restore the vehicle to its pre-damage condition while preserving the factory finish. We also work directly with insurance companies to simplify the process, and we provide a free rental vehicle during repairs.
Our team serves drivers in Converse and San Antonio, Texas, as well as El Paso. Begin by booking your free hail damage inspection to have your car evaluated. When you are ready to schedule, you can book now directly through our site.
Frequently Asked Questions
How do I prove hail damage for insurance?
Prove hail damage with dated, specific evidence. Take photos and video in daylight from several angles, including close-ups of each dent with a tape measure or coin beside it for scale. Record the date and time of the storm and of your photos, note the location, and keep any weather reports you can find. Get a written repair estimate from a shop that documents each dent. Together these show what was damaged, when, and how severely, which is what an adjuster needs to verify the claim.
Is it worth reporting hail damage to an insurance company?
Whether it is worth reporting depends on the size of the repair compared with your deductible. Repairs are often costly, so it can make sense to compare the estimate to your deductible before deciding. Filing a claim also has effects on your policy, and that varies by insurer, so check your policy terms and ask your agent how a claim may affect your rates. If the damage is extensive, reporting is usually the better choice because you have documented proof of a covered loss.
Do you have to report hail damage to insurance?
You are generally not required to file a claim for every hail event, but your policy usually sets a deadline for reporting covered losses. Most policies expect prompt notice, so reporting soon after the storm protects your right to coverage. Review your policy for the reporting window and any duties after a loss, such as protecting the vehicle from further damage. Delaying can complicate the claim, so document the damage now even if you have not decided whether to file.
What photos should I take of hail damage to my car?
Take wide shots of each panel showing the whole car, then close-ups of every dent. Photograph the hood, roof, trunk, doors, mirrors and glass. Shoot in daylight without flash glare, and place a tape measure or coin next to each dent for scale. Capture the full car from all four corners, and record a short video walking around the vehicle. Keep the original files unedited, with their date stamps intact, so the adjuster can verify when they were taken.

